Showing posts with label Lyrical Letters cartridge. Show all posts

Saturday, 16 February 2013

Dance

Hello there

 I've had the Music Hall set of stamps by Indigo Blu for a while and I bought them with the purpose of making my daughter a canvas using the sentiment stamp. I also bought the canvas ages ago. It was only on Thursday night that I finally set to making a sketch of what I wanted basically to go on there. That night, I also made a Stampendous butterfly with blended inks onto photo paper. That was it - I had my colours decided and an element.

Last night I set to starting on it. I just sprayed some blue ink and that was it; I was off. My fingers and lovely new nails were also blue but that's by the by; I really do need to wear gloves or get some strong hand cleaning stuff for when I'm spraying or just not buy that particular brand again, as it's lethal. My lovely nails now look as if there's dirt sitting in them - grose! 


The skirt idea came from pinterest - Junelle Jacobsen did that one. I stamped some pattern paper with the musical score stamp from the set to make the 'material'. I also embossed with that stamp, behind the girl and the doily.
The large notes were cut from the Lyrical letters Cricut cartridge,
as ever, I used the negative as a stencil as well as
the positive to be glued on.

I loved making the pattern go from the edge around to the front

I decided to keep the frame around my girl as it helps her stand out more -
I inked the edges though to blur that edge a bit
I got help from another pinterest post of Andreal Designs of she art dancing. I couldn't find any other she art dancing, so that helped me with the legs, feet and arms and fan.The flower on the belt is fussy cut from a paper pad, as is the fan. 

The original finished version still wasn't looking right in my opinion, so since taking that photo,I've added some thin black lines which follow the outline on the right hand side and they get shorter and shorter. I thought this would help with the idea of motion on my girl.

I had primed the canvas first before starting but I had trouble sealing the finished background. I tried Claudine Hellmuth's glossy medium but it started to make the paint/ink blue. If you have any suggestions as to what I could use, please do let me know. For now, I'm just going to leave it.

I had great fun with this, trying to add loads of layers and details and messing about with paint colours, just as the inspiration took me (so much for doing a sketch!) and my daughter really likes it, which makes it all worth while, so I'm off to put it on her wall. 

Take care out there

Monday, 28 January 2013

Time

Hello there

Tonight I've actually managed to get some crafting done! Last week was awful with my daughter in hospital or very ill at home, so I either didn't have the time or I just couldn't focus on crafting. Thankfully, she seems fully recovered now, so life is getting back to normality now. Change is nice but we can do without that sort of change.

I had intended on doing a friend; Catherine's sketch as appears on her blog but I couldn't remember the date she'd posted about it and by the time I got round to asking and finding out, I had already got underway with some die-cut remains from a couple of weeks ago. Yes, stuff sits on my desk for a long time, even if I do have to clean it around when my mum comes to stay for the weekend :-) Catherine has set up a monthly challenge of creating a sketch and getting her readers to interpret it and share with her. My sketch for her will have to wait for another day now - that's no problem, as Catherine is used to me being slow. Head on over there (after reading this of course) and have a go yourself.

If you saw my last post, you'll recognise elements of this page, as they're the same as I used on that scrapbook page i.e the stamp die-cuts and stencil and the postcard from the Steampunk digikit designed by Sarah Hurley for CraftArtist.
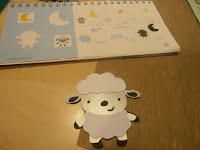
I've also added a gorgeous little sheep from Create A Critter cartridge.
I had to do this as the top photo shows a field, which actually had sheep in it, who got out of the field when we were there - very funny and not dangerous, as I think there's only about 5 cars on the whole island of Muck. It's gorgeous!
I used the stencil from the sheep die-cut and created almost little shadows of him in the right hand corner under the title. I love fun little elements like that, which are impromptu ideas, off the cuff, so to speak. 
The font of the title is 'loop de loo' from the Lyrical Letters cartridge - I sized it on Cricutcraftroom.


The bird tag is from a kit I have and there's that postcard again. I also used some Tim Holtz tissue tape in a couple of places on the page, as I thought that they fitted the theme really well.

Well, I did enjoy that. A stress free, productive yet relaxing evening. Don't mind if I do! :-)

Take care out there

Saturday, 18 August 2012

Congratulations on passing exams

Hello there

Here's a card I made recently for a very clever wise old bird (she's so going to kill me if she reads that 'old' bit :-)) who has recently found out that she's qualified for ACCA, which is an accountant's certifcate. She has worked full time the whole time she's been studying, so she should be extra proud of herself.
I had the basic idea of using the owl from Create a Critter and then the rest just flowed from there. The bunting is from the Carousel cartridge (I hand wrote congratulations on there) and the grass is from Plantin schoolbook cartridge. I like the way the branches go over the edge of the card; thankfully I knew the envelope I was using was bigger than the card blank. The trees are on an icon feature for the 'booklet' on page 38. I drew the eyelashes on the owl myself. The branch the owl is sitting on is from page 25 of Create a Critter; using the accessory function. I used Cricut Craft room to get it all the correct size.

I decorated the inside with a frame from Wild Card cartridge. I cut it out twice so that I could get a different coloured internal section. I used MS Word to write the sentiment in the middle using font Sakkal Majalla.
I used 'real dial size' option on the letters 'ane',
 as they were too small otherwise in comparison
 to the J
I machine stitched around the edges of the front.
This is a cartridge heavy card but I really enjoyed making it and Jane, the world's your oyster now!

Take care out there

Monday, 16 July 2012

On a theme

Hello there

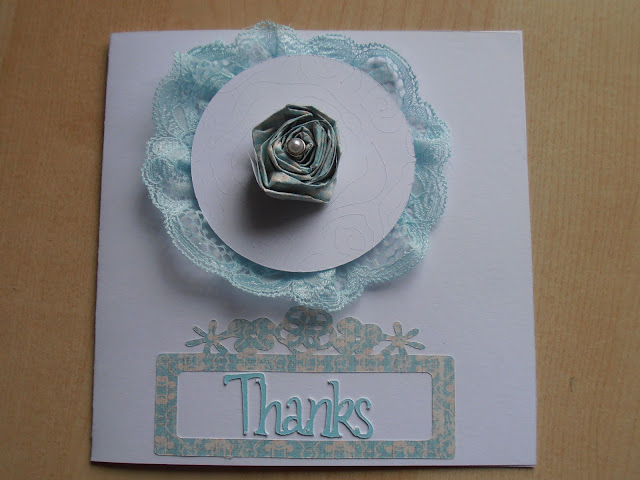
Since I enjoyed making the birthday card I showed you yesterday so much, I decided to make another card on the same design. This time I needed a thank you card for the ladies who trained me recently in my new job.
As you will see, most things are the same such as the main topper. The envelope was slightly different too but still cut from Wild Card Cartridge- Doily-shift cut at 'fit to page'.

The frame around the sentiment is from the same cartridge. I cut it at 8.47cm x 4.27 and then I got the word 'thanks' from Lyrical Letters cartridge and on CraftRoom I made sure it was exactly the right size to fit in the frame. I then cut the frame from the same paper as the flower was made from and the word 'thanks' was cut from some blue cardstock.

Yet again, a very small piece of card saves the day


The flower shape cut from the Paisley cartridge (button feature)
will allow me to write the recipient's name on the envelope
I like.

Take care out there
Related Posts Plugin for WordPress, Blogger...