Showing posts with label Create a Critter. Show all posts

Tuesday, 23 April 2013

Dogs

Hello there

Here's a little card I made for a dog loving friend of mine. It was made with the help of several things including the dog (terrier) from the Create a Critter Cricut cartridge and some paper from Pebbles. I did my usual little look around the internet for ideas/inspiration and found a couple of cards which got me thinking, including this one and another from the Cricut community site who used the same paper.


I couldn't believe my luck when I realised that I actually have some of the tiny little bells in my stash, as it really helps the card 'pop'.

The little bell is so cute
I put this on the inside for extra smiles from the recipient  :-)
Fun and games

Take care out there

Monday, 28 January 2013

Time

Hello there

Tonight I've actually managed to get some crafting done! Last week was awful with my daughter in hospital or very ill at home, so I either didn't have the time or I just couldn't focus on crafting. Thankfully, she seems fully recovered now, so life is getting back to normality now. Change is nice but we can do without that sort of change.

I had intended on doing a friend; Catherine's sketch as appears on her blog but I couldn't remember the date she'd posted about it and by the time I got round to asking and finding out, I had already got underway with some die-cut remains from a couple of weeks ago. Yes, stuff sits on my desk for a long time, even if I do have to clean it around when my mum comes to stay for the weekend :-) Catherine has set up a monthly challenge of creating a sketch and getting her readers to interpret it and share with her. My sketch for her will have to wait for another day now - that's no problem, as Catherine is used to me being slow. Head on over there (after reading this of course) and have a go yourself.

If you saw my last post, you'll recognise elements of this page, as they're the same as I used on that scrapbook page i.e the stamp die-cuts and stencil and the postcard from the Steampunk digikit designed by Sarah Hurley for CraftArtist.
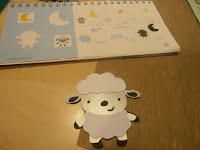
I've also added a gorgeous little sheep from Create A Critter cartridge.
I had to do this as the top photo shows a field, which actually had sheep in it, who got out of the field when we were there - very funny and not dangerous, as I think there's only about 5 cars on the whole island of Muck. It's gorgeous!
I used the stencil from the sheep die-cut and created almost little shadows of him in the right hand corner under the title. I love fun little elements like that, which are impromptu ideas, off the cuff, so to speak. 
The font of the title is 'loop de loo' from the Lyrical Letters cartridge - I sized it on Cricutcraftroom.


The bird tag is from a kit I have and there's that postcard again. I also used some Tim Holtz tissue tape in a couple of places on the page, as I thought that they fitted the theme really well.

Well, I did enjoy that. A stress free, productive yet relaxing evening. Don't mind if I do! :-)

Take care out there

Tuesday, 25 September 2012

Let's get it done

Hello there

The other day I told you about a broadcast of a paperclipping.com programme about how to organise your scrapping. Do you scrap your photos immediately? Do you print off photos once a week, whether you're going to use them or not? Do you plan what pages you're going to do each month?
This time, I went for 'do it now'! I had kept some memorabilia from the Memory Walk I did for The Alzheimer's Society and knew I wanted to use them, so I set to laying things out and choosing which photos to use and what size I'd need them. I do like this stage, as you rummage around, you fiddle and faff with various ideas of how to present your story. Only when you're happy with that can you get on with the serious business of using glue!

We had a great day and it stayed dry, which was excellent. We've so far raised over £200 between us, so I'm chuffed about that too. The photo at the bottom right hand side shows a statue of Red Rum, as the walk was held at Aintree racecourse, which is the course where the Grand National is run every year.

The layout came together pretty quickly for my normal rate. The backing paper is a K & Co. paper; the photo really doesn't do it justice. I just played around then with other ideas and they succeeded, so I was a happy girl.
A scalloped edge to the page,
demands a scalloped edge to the
photo mats

If you don't have the correct colour
embellishments, then ink them up
The balloon was cut from Create a Critter on page 30 - layer 1 of balloon2. I used the negative of that cut to use as a stencil for the journalling section I have on the left hand side. Shabby shutters was the distress ink colour I used on the various items.

I have more memorabilia from the day, so watch out for more layouts.

If you're reading this in September or October 2012, it's not too late to make a donation to The Alzheimer's Society on my justgiving page.

Take care out there

Monday, 3 September 2012

I'm back at it!

Hello there

Yes, yee hah! I'm back to doing some crafting. I've been in Florida on holiday for two weeks and I've also been to Aviemore in Scotland for a week in August, so it's not been a great crafting time. I did actually make an ipad case in the week between Aviemore and Florida but I can't find the photos anywhere. I suspect that's because they got deleted from the sim card, trying to make room for more holiday pics. I definitely want to make at least one more, so hopefully I'll share the photos before they disappear off the face of the planet.
The only crafting I managed in Florida was a trip to Joanne's in Altamonte. I was in there two hours whilst the family had to look around there too. I had no idea I'd been that long until I left. They had so much fabric in there and so neatly displayed and easy to get it; I loved it.
Alright, enough of embarrasing photos, back to the matter in hand, which is actually meant to be a card I've made for the birthday of a friend of my daughter's. I wanted to use the Indian Summer papers from the latest Craftseller magazine. My daughter looked through the samples and chose one but then I remembered about a card I'd seen over at My Craft Spot blog which uses negative images. So I just went ahead and did the card I wanted to do. I'll probably still have to make the one she chose but I'm hoping she'll prefer the design of the one I've made - fingers crossed!

I started off by cutting out all the papers and embellishments and added bits of Glossy Accents and glitter where I thought would be nice.


I used a 15cm x15cm card blank and then cut the patterned paper a few millimetres smaller than that and then cut the top piece from Neenah super smooth card at about 14cm or smaller; sorry, I'm not much use with measuring as I usually just hand cut the same size pieces down to the size I physically can see I need.

Firstly I stamped 'Happy' up the bottom left hand corner and then I cut 'birthday' out vertically with Plantin School Book using the roly poly button. In my trial cut, I used 1.5cm but I thought it was a bit too tight to the edges, so I changed the setting to m.m's and made the letters 13m.m; real dial size too. Your sample cut will show you whereabouts you need to start cutting the word to make sure it fits on and also so that it's high enough to allow room for the words 'to you' underneath.


 I used Pinflair glue to place that mat on top of the patterned paper, ensuring it was raised slightly; this gives the best result for seeing the paper through the negative letters.

Once that had dried, I cut the balloons from Create a Critter using standard shift. I cut the tails off two of them and replaced them with cherry red Baker's Twine, tied together at the end.
A bit of a tip for new Cricut expression users; to find an image on your cartridges, use the image search facility on Cricut Craft room. It's brilliant as it gives the results in either image order or cartridge order, so you can not only pick the best ones you have but also be able to go straight to that cartridge to get it cut. I'd also suggest you do keep the software of your machine up to date. I had to update mine whilst doing this card; it feels like a real pain at the time but it's important to keep it usable for you.

Since I had cut out the balloon shapes on a practise piece of card, I was left with the stencil of those shapes, so I put it to good use by putting the balloon shapes on the envelope and inside the card. It finishes the whole package off nicely in my opinion.

Let's hope my daughter agrees.

Take care out there.

P.S For those of you paying attention, I'll try to remember to show you how I actually use the embellishments from the magazine in another post, as I didn't actually use any on this card :-)

Saturday, 18 August 2012

Congratulations on passing exams

Hello there

Here's a card I made recently for a very clever wise old bird (she's so going to kill me if she reads that 'old' bit :-)) who has recently found out that she's qualified for ACCA, which is an accountant's certifcate. She has worked full time the whole time she's been studying, so she should be extra proud of herself.
I had the basic idea of using the owl from Create a Critter and then the rest just flowed from there. The bunting is from the Carousel cartridge (I hand wrote congratulations on there) and the grass is from Plantin schoolbook cartridge. I like the way the branches go over the edge of the card; thankfully I knew the envelope I was using was bigger than the card blank. The trees are on an icon feature for the 'booklet' on page 38. I drew the eyelashes on the owl myself. The branch the owl is sitting on is from page 25 of Create a Critter; using the accessory function. I used Cricut Craft room to get it all the correct size.

I decorated the inside with a frame from Wild Card cartridge. I cut it out twice so that I could get a different coloured internal section. I used MS Word to write the sentiment in the middle using font Sakkal Majalla.
I used 'real dial size' option on the letters 'ane',
 as they were too small otherwise in comparison
 to the J
I machine stitched around the edges of the front.
This is a cartridge heavy card but I really enjoyed making it and Jane, the world's your oyster now!

Take care out there

Thursday, 7 April 2011

Instructions for Hootin tootin card

Firstly I must give thanks to the two ladies; Peggy and Donna from Daily Grace Creations http://dailygracecreations.blogspot.com/2011/03/hoohoot-had-birthday.html who inspired me to make this project on my new Create a Critter cartridge for my Cricut. It's not obvious straight away but it's actually an easel card.

The base card is 18cm wide and basic A4 length= 29.5. Score this in half and then score one half in half again; which is basically 14.7 and then 7.3cm
The topper with the owl on is 18cm by 14.7cm. The next layer is 17.5 by 14. The top layer is 16.5 by 13.5.
The owl is created on the Create a Critter cartridge and is sized at 23/4’s in
The branch is from the same Owl section of CAC at 2in
The sentiment on the topper was created on Serif Craft Artist Professional using the ‘Cheers’ letters at 0.5in. The base layer of the matting and layering underneath is 8.7 by 4.7cm with the top layer being 7.9 by 3.7.
The word hoot is from the CAC cartridge at 1.5in. The flower in the middle of the second ‘O’ is one of the flowers from the CAC cart; you have to cut it with a second flower but the other one can always be used on the envelope. The ‘in’ bit is in the same size from the ‘Cheers’ letters as is the ‘tootin birthday’ but they were 0.5in. All the words other than ‘hoot’ were printed on Safmat.
I custom made the envelope from a My Craft Studio cd rom called ‘Fab Glam fifties’ as they have a very easy section on that for doing just that. The back is width= 15.71, height= 19.5. The front is width=20.59, height=24.66
Related Posts Plugin for WordPress, Blogger...