Showing posts with label flower shoppe cartridge. Show all posts

Wednesday, 6 February 2013

The Osmonds

Hello there
 A fairly quick little post here, mostly to help me remember how I made the cute little paper roses (hence the title! Before any of you fellow oldies say anything - I know it was Marie Osmond who actually sang the song :-) )

I used the Flower Shoppe cartridge and after watching loads of videos and tutorials, which took me off on the usual lengthy youtube session, I decided upon the best method for me with the tools I have. I cut four 'fun4' shapes from page 16 of the booklet at 2.5inches.

I cut one petal off one of them, two off another and three off another, which of course left one of them untouched. For this method, you don't need the little tab, so it's up to you if you cut it off or leave it. I then roughed them up a bit, to make them easier to work with. As part of that scrumpling, roll over the top of each petal to the outside; this will give them a natural shape once completed. Remember to ink around the edges at this stage, if that's the look you want.
Now take the smallest one and roll it up to form the centre piece. Roll from the straight edge inwards. You need to do it so that there are two petals opposite each other for the best look, then glue the edge to the back. With the others, bring the straight edges together and overlap the outer petals and glue them. 

Once set in place, put them in your spray booth i.e old cardboard box. Cut 'fun5' leaf out at 1.5inches, as many times as you like and ink around the edges and put them in the box too and spray with SU glimmer mist. This just adds a certain je ne sais quoi :-)
Here's a couple which didn't make the final project. It really is vital that you use practise pieces first, so that if they're no good, you won't feel cross with yourself for wasting your lovely card. Actually doing things works so much better than just reading or watching about them. 
I also cut one flower at 1.25inches and some of the leaves at a smaller size too.
They really help set off my table decorations which I firstly filled with some tiny dried rosebuds.

Word to the wise - just found a website called photovisi. That's where I got that brilliant photo collage from. It's extremely quick and easy to create a fun display. Love it!!!!

Take care out there

Monday, 26 November 2012

A whole lotta die-cutting

Hello there

Let's see how Blogger treats me tonight.

Just a quick post to show you this gorgeous yumminess:
That photo doesn't do the 'Summer Blues' by Tilda paper pack any justice but believe me, they're so lovely. They die-cut on my Cricut like a dream too, hence I've gone to town with it:


Hearts ready to be 'taken out'
I've used the Flower Shoppe cartridge for all the cuts and that's about all I can tell you about this project right now, as it's all hush, hush :-)
                           ------------------------------------------------
Yee hah! Blogger didn't give me hardly any hassle at all - I just had to put the photos on Picasaweb first and then insert them here. This post has taken me five minutes, which is the way it should be in my opinion.

Take care out there

Thursday, 18 October 2012

My babies

Hello there

Today's post is about two things. Firstly it's about a mini album I've made thanks to Carole Bryson Wood of Stampin' Up fame. I attended a class of hers at my friend's house last week and she gave us some cardstock to complete two projects.

I've just realised that I haven't blogged about the Christmas decoration we made that night, so I will rectify that situation now, albeit briefly.
The link I provided above will take you straight to Carole's blog with the instructions on how to make it. This one is slightly different as we used the gorgeous 3.5 in scalloped tulle ribbon in cherry cobbler colour- item number 127841 if you want to order some! Hey, maybe I should become a demo! :-)

                  -------------------------------------------------------------
Anyway, back on track Diane!

The mini album is really dinky and cute. The papers I used aren't really relevant to the subject of the photos; our two cocker spaniels but this album is a prototype for me, so I learnt some things along the way but still want to use the album.

The reason I chose photos of the dogs is that the poor little mites are at Cheshire Dogs' Home at the moment being neutered and micro chipped. It's so weird in the house without them and I keep thinking of them as they were led away from me to the kennels to wait for the operation. They'll be recovering by now. I do hope they're ok. Whenever the phone rings, I dash to the phone, as they said they might call us earlier than the collect time of 3 to 4.30p.m if they were stressed. The only stupid people on the phone are recorded messages from banks about claiming back PPI!! Sooo annoying, especially today.

For something different, I've made a video for you to watch,showing some of the stages of the project.


I'll try to remember to let you know how the boys got on. I've loved making the album and looking at the photos of the boys, so it's been a good day so far.

Take care out there

Friday, 5 October 2012

Vellum

Hello there

Can you believe that I had never worked with vellum until this week. Am I completely nuts?!! People who know me, needn't answer that, thank you all the same! :-)

Now to trace this back is a little convoluted but bare with me. Sally is a friend I only met once at a Summer Craft show at Doncaster; gosh, it must be two years ago now?! On her Facebook page just over two weeks ago, she mentioned about liking a Sue Wilson demo with vellum, she'd seen on Create and Craft. Christine Emberson commented on that link by putting her blog link about using the Rose Creations die with vellumAfter reading that, I was further inspired about an offer available on C&C and ordered some bright and some pastel vellum. In that same order, I got some coloured Cosmic Shimmer pearlescent glue; black, gold and white.

I was so excited when the bundle was delivered, I promptly posted a photo on Facebook and got cutting. One reason why I hadn't bought vellum before was because I wasn't convinced I would be able to cut it with my Cricut. I admit it; I was wrong. It cuts really well as long as your mat isn't a mess, as one of mine invariably is since I cut fabric on one.
I even had a go at inking the vellum
to see if it would stick, with
not brilliant results
The card design which inspired me was in the March 2012 Cricut magazine; it's by Shantaie Fowler. Her card uses Elegant Edges and Simply Charmed cartridges, of which I have neither.

The next stage is to do a rough pen/pencil drawing of what I'm aiming for.


Next is card selecting. I went for a white coredinations card as the base, which I wish I hadn't really as I don't find it very strong for card bases. I might have to deal with that issue before giving it to the person it's intended for.

I used Cricut Craftroom and Plantin Schoolbook cartridge to weld two scalloped squares together to create the base shape. I then made a single scalloped square ensuring it was smaller than one of the card base squares. I used a hole punch to get the cut out circles and inked them up with a Spectrum Noir pen.

The smaller scalloped square was glued in place using Pinflair glue, so that it's raised above the base.

I cut the flowers at various sizes from Flower Shoppe; page 14 in the manual - heart. The leaves are Fun5. The button in the smaller flower is from SU- love the colours. The dots around the flowers are the gold cosmic shimmer glue - love them too.

I made the tag from a section of American Crafts Dear Lizzy neapolitan - Cheerful notes.
*An aside - why do they give each sheet such a long name?
Ribbons are from my stash.

I'm rather pleased with it!


The little box for it isn't bad either :-)

Aren't we lucky these days, with the technology available for us to get so much crafty inspiration from so many people?

Take care out there.

Thursday, 13 September 2012

Challenging life

Hello there

The challenge entry version
Today's little entry for my blog is indeed about challenging life. Some of you will read that to mean that you need to challenge life and all the difficult times it can present us with. Others of you will read that as that my life is challenging at the moment. That's fine. The both meanings are relevant in this context but it's also linked to the fact that I entered a blog challenge over on The Crafty Network's blog.

Entries for the challenge had to be emailed by midnight last night i.e Wednesday September 12th 2012. I only finally decided to make something at 9p.m. This isn't an ideal situation for creating pretty stuff when you've been up since 5. At work for eight hours from 6a.m. It also doesn't help to have had issues to deal with at home. I felt that I had to commit to entering though. May Flaum has recently discussed this very issue recently, in that we often have to fight for our right to craft, so to speak. We all have things in our lives which pull us away from crafting but if you really enjoy it, you need to make some sacrifices along the way to enable you to do it. For many of us, that involves lack of sleep! Find a hidden drive within you to keep your muse flowing and you'll reap the benefits without a doubt.

I finally emailed a photo of the card at 11p.m. I could barely keep my eyes open and I was keeping Chris up, as he's sleeping in my craft room/guest room because he has bronchitis. He was useful for helping me with some awkward glueing though, as I couldn't leave sections to dry as I would normally do.

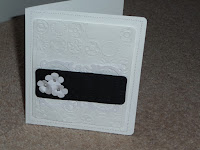
I firstly embossed white card with my new and much loved 'Bloom dots' folder and rounded the edges. I then did the same to a black piece of card. The flowers were created on my Cricut using Flower Shoppe cartridge- scallop4 cut at 2cm. The swirly frame was cut using Ornamental Iron2 - lace2 cut at 4cm. I then put some self-adhesive gems in the flower hearts. I used Pinflair glue gel to raise the various sections off the base, as that creates shadows, forming more black to tie in with the theme 'Black and White' of the challenge.
The finishing touch at the time was machine sewing around the edge of the card blank. I am annoyed that the holes at the top aren't straight- this was my second attempt too but at the time, I didn't have the energy or time to try again, so I had to run with it as it was. I didn't do a sentiment for exactly the same reason.
Final version
This morning I've fiddled with it some more. I sprayed some Perfect Pearls Mists - perfect pearl, all over the card. I added some more gems to the swirly section and created the sentiment tag. I'm surprised at how much I like it, as normally I love colour. I also decorated the envelope with some black paint and a stencil created by the swirly die-cut.

If you see the other entries for the challenge, you'll see that I don't stand a chance of winning but that's ok. I am proud that I entered and with a project that I'm happy with (although I'm happier with the final version than I am with the entered version).

Take care out there and keep crafting as much as you can!

Saturday, 21 April 2012

More Spring Jubilee

Hello there

I'm a happy girl as I've been able to play with the Pink Paislee Spring Jubilee collection again. It's a birthday card for Chris's mum.
The card base was 25 x 14 cm. The blue patterned paper was cut at 5x13.5cm. The yellow paper was cut at 7.5 x 13.5cm. I then used my paper trimmer to cut the wavy line down a thin strip of the blue patterned paper.
The circular flowered mat was supplied with the paper kit.
The flower was cut from Flower Shoppe cartridge - I used the Cricut Craft Room, so not certain of all the sizes but the largest one was about 5cm square. It's the heart2 flower. I used a 8mm pearl brad as the centre.
The leaves are from the same cartridge -exotic5 - size 5.8x5cm.
I added the ribbon, just because I wanted to and I thought the colours went well.
The frame and the sentiment stamps are Stampin' Up but the butterfly one is part of a set I got from Cardmaking and papercraft magazine. I used 'worn lipstick' distress pad to edge and to stamp with.


This will need to go in the post so I was only able to stamp on it - do you like the pretty butterfly arch? :-)

Take care out there

Related Posts Plugin for WordPress, Blogger...