Saturday, 29 September 2012

Quickie

Hello there

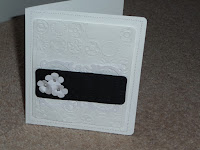
I had some time tonight and yet didn't have the energy to do anything too taxing as I'm full of cold, so I've made this card with things on my desk. This is definitely a benefit to not tidying up all the time!

This may not be an exciting card but I like having thank you cards and get well cards at the ready, otherwise waiting until I get the chance to make one can put pressure on me and often then the time has passed. This isn't the best photo in the world by any stretch of the imagination but hopefully it will make someone smile when they receive it as it does look better in real life.

The papers are still the ones from the Craftseller magazine. I put some gold cosmic shimmer glue in the centre of the embellishments and the flower on the sentiment.

Finishing touches on the inside of the card
and the envelope help bring it all together.
Take care out there and apologies for the poor quality photos - I've yet to work out how to make the camera take good internal night time photos.

Tuesday, 25 September 2012

Let's get it done

Hello there

The other day I told you about a broadcast of a paperclipping.com programme about how to organise your scrapping. Do you scrap your photos immediately? Do you print off photos once a week, whether you're going to use them or not? Do you plan what pages you're going to do each month?
This time, I went for 'do it now'! I had kept some memorabilia from the Memory Walk I did for The Alzheimer's Society and knew I wanted to use them, so I set to laying things out and choosing which photos to use and what size I'd need them. I do like this stage, as you rummage around, you fiddle and faff with various ideas of how to present your story. Only when you're happy with that can you get on with the serious business of using glue!

We had a great day and it stayed dry, which was excellent. We've so far raised over £200 between us, so I'm chuffed about that too. The photo at the bottom right hand side shows a statue of Red Rum, as the walk was held at Aintree racecourse, which is the course where the Grand National is run every year.

The layout came together pretty quickly for my normal rate. The backing paper is a K & Co. paper; the photo really doesn't do it justice. I just played around then with other ideas and they succeeded, so I was a happy girl.
A scalloped edge to the page,
demands a scalloped edge to the
photo mats

If you don't have the correct colour
embellishments, then ink them up
The balloon was cut from Create a Critter on page 30 - layer 1 of balloon2. I used the negative of that cut to use as a stencil for the journalling section I have on the left hand side. Shabby shutters was the distress ink colour I used on the various items.

I have more memorabilia from the day, so watch out for more layouts.

If you're reading this in September or October 2012, it's not too late to make a donation to The Alzheimer's Society on my justgiving page.

Take care out there

Sunday, 23 September 2012

Alzheimer's Society

Hello there

A quick note to let you know that I'm doing a sponsored walk today in aid of the Alzheimer's Society. I'll be doing the walk with my mum and daughter as we have first hand experience with my Uncle Ed, of how Alzheimer's has such a big impact on the person involved and the family. Please do visit my justgiving web page to learn more about the 'Memory Walk' and hopefully you will donate some money towards this charity. My daughter and I have raised £54 so far and my mum has got more than that too, which is excellent considering the fact that we only thought of doing it two weeks ago.

This video also explains some more about why the Memory Walk can help make a difference to a lot of families lives.
 
 
Take care out there

Saturday, 22 September 2012

Points of interest

Hello there

I made the card shown out of stuff lying around my table. You may well recognise the papers which have still not all been used up; they're from the December issue 15 of Craftseller 2012. The little embellishments are what was left of a frame I cut out recently from Ornamental Iron2. The leaves behind the 'for you' image are also remains of some I used recently- they were cut from Plantin School book. The 'for you' stamped image is one I got from what was meant to be a craft and chat session at a friends house on Tuesday but I just wasn't up to crafting, so I just pinched another friend's SU stamps and made some images to use later. So there one of them is. The little dots were created with Cosmic Shimmer acrylic glue. I ordered some in different colours this week, as I love the way Sue from particraft always uses them to make swirls and purely decorate her work. I created a scalloped edge for extra detail. In my humble opinion, you would never know that this was put together purely using my creative flow with bits off my desk.

Go on, I dare you; use your creative flow and use up some leftovers whilst you're at it!

This brings me nicely onto my first point of interest, which is that Cricut have now got an EU Facebook page. They've only got 107 likes at the moment so head over there if you're in Europe of course, as we may well get some prizes and deals which we can actually participate in, rather than it all be America based and out of our reach. I sent them a copy of this card, which they immediately shared with everyone, which made me happy.

Another point of interest is that for the first time ever I listened to a paperclipping transmission. For those who don't know, this is a radio type talk show with artists and crafters alike discussing a different topic each time. This talk was all about how you organise yourself to create; how do you remember to make a page about somethings; how do you deal with photos? It's very amateurish as when a guest speaks, they can't hear the other guests and presenter, so they often talked over each other, which I found highly irritating. Each guest is on the phone doing the interview; not in the studio.It's very indepth and in my opinion, it went on for far too long but still interesting to hear how other people sort themselves out. Head over there and see what you think. May Flaum was involved which is what got my initial interest but she wasn't at her best in the environment. Ali Edwards and Heidi Swapp are in a more current one, so maybe somebody who inspires you will be involved in one of them.

Very nice packages to receive and yes,
that is the brand new SU magazine full
of goodies plus the inks which
I'm going to have great fun with :-)


Another great crafty event for me this week was yesterday when the postman delivered these goodies.


Take care out there

Saturday, 15 September 2012

The journey is often most of the fun

Hello there

Today's card is yet another example of me using some recent papers from the Craftseller magazine. The papers are still sat on my desk, so the plan is to use them all up. I've no idea how long this'll take though, as I'm not the quickest at the best of times. I may well have hit upon a design I'm happy to duplicate, probably with little tweeks on each one to make them feel different.

Firstly I selected which papers I would use together. I placed them on the card blank I made to fit into the envelope I wanted. The card I saw which struck me to get me properly started was on particraft's blog. My card ended up being quite different to that indeed but it sparked my interest and gave me a focus on what elements I needed.

I then went into Word and typed out the sentiment in a colour I thought would match some of the circular images in the bottom patterned paper.

Next I went onto Cricut Craftroom as I knew that Ornamental Iron2 cartridge would have a frame type that I wanted. Sure enough it did. I made sure the frame was the right size to fit around the sentiment; which is one of the joys of CCR. I just happened to have a scrap of card, almost exactly the right size for this cut. I just LOVE it when that happens!
I thought that the sentiment wasn't quite right. So I searched for which leaf cuts I had on my Cricut and used some of the decorative paper (glued onto thicker paper, as the paper itself doesn't cut well at all without the extra support of more paper underneath it) to cut them out.

What you see in this photo is the decorative leaf pattern I inked along the inside bottom of the card. I used dusty concord distress ink on my craft mat, with a few sprinkles of water thrown in. I dabbed a small section of my old bath sponge and used the negative of the leaf die cut as a stencil. I also LOVE doing this!


Even more use of leftover die cuts was made on the envelope. I coloured the frame leftovers with dusty concord.
 
 
The final version is totally different to my original inspiration but that's how it is for me usually. I take it along the path which is open to me; which papers I have, which equipment I have, how much time I have. It's a creative process after all.

Take care out there

Thursday, 13 September 2012

Challenging life

Hello there

The challenge entry version
Today's little entry for my blog is indeed about challenging life. Some of you will read that to mean that you need to challenge life and all the difficult times it can present us with. Others of you will read that as that my life is challenging at the moment. That's fine. The both meanings are relevant in this context but it's also linked to the fact that I entered a blog challenge over on The Crafty Network's blog.

Entries for the challenge had to be emailed by midnight last night i.e Wednesday September 12th 2012. I only finally decided to make something at 9p.m. This isn't an ideal situation for creating pretty stuff when you've been up since 5. At work for eight hours from 6a.m. It also doesn't help to have had issues to deal with at home. I felt that I had to commit to entering though. May Flaum has recently discussed this very issue recently, in that we often have to fight for our right to craft, so to speak. We all have things in our lives which pull us away from crafting but if you really enjoy it, you need to make some sacrifices along the way to enable you to do it. For many of us, that involves lack of sleep! Find a hidden drive within you to keep your muse flowing and you'll reap the benefits without a doubt.

I finally emailed a photo of the card at 11p.m. I could barely keep my eyes open and I was keeping Chris up, as he's sleeping in my craft room/guest room because he has bronchitis. He was useful for helping me with some awkward glueing though, as I couldn't leave sections to dry as I would normally do.

I firstly embossed white card with my new and much loved 'Bloom dots' folder and rounded the edges. I then did the same to a black piece of card. The flowers were created on my Cricut using Flower Shoppe cartridge- scallop4 cut at 2cm. The swirly frame was cut using Ornamental Iron2 - lace2 cut at 4cm. I then put some self-adhesive gems in the flower hearts. I used Pinflair glue gel to raise the various sections off the base, as that creates shadows, forming more black to tie in with the theme 'Black and White' of the challenge.
The finishing touch at the time was machine sewing around the edge of the card blank. I am annoyed that the holes at the top aren't straight- this was my second attempt too but at the time, I didn't have the energy or time to try again, so I had to run with it as it was. I didn't do a sentiment for exactly the same reason.
Final version
This morning I've fiddled with it some more. I sprayed some Perfect Pearls Mists - perfect pearl, all over the card. I added some more gems to the swirly section and created the sentiment tag. I'm surprised at how much I like it, as normally I love colour. I also decorated the envelope with some black paint and a stencil created by the swirly die-cut.

If you see the other entries for the challenge, you'll see that I don't stand a chance of winning but that's ok. I am proud that I entered and with a project that I'm happy with (although I'm happier with the final version than I am with the entered version).

Take care out there and keep crafting as much as you can!

Saturday, 8 September 2012

Rainbow cake

Hello there

A very quick post to tell you about the rainbow cupcakes my daughter and I made today. It was a practise session for the birthday cake she'd like to have. To find the recipe itself, go to my pinterest board and in the baking ideas you'll be able to click back to the recipe. It's really easy  other than when you put the mix into the cupcakes, as that's quite fiddly. Try to ensure that your mixture drops from the spoon when picked up, as it needs to be easy enough to move around within the cupcake cases.

I used food colour pastes for the first time and the intensity is far greater than the liquids I've used in the past; which is just the ticket for this rainbow cake. We had fun in a 'new to us' shop looking at a whole range of baking and crafty stuff. The shop is called Wyndsor's in Warrington. There's a little cafe there too but that was shut at 4.30 when we got there. It was also a shame that the staff weren't particularly helpful yet there seemed to be loads of them but none even said hello.
 

Maggie pointing out that she's also wearing
her colourful hand made tie-dye
t-shirt, so in keeping with the theme


Take care out there


Thursday, 6 September 2012

More of the Craftseller magazine embellishments and papers

Hello there

As promised in a post a few days ago, here's some cards I made using the embellishments and papers which came with the issue 15 of the Craftseller magazine.

This card started off really well. I thought almost immediately of having the tag embellishment from the magazine layered onto a die-cut larger tag and that on top of a stencilled inked tag. I used plum Baker's Twine as the bow. I learnt that Hunkydory silk art card die-cuts like a dream - why I haven't learnt this before is another point altogether! The stencil comes from the negative of the diecut tag - I LOVE using the negatives and positives of die-cuts, as it makes it feel like I'm getting more out of the paper stock; makes it feel more of a creative process.

Then I got stuck.

I had the three tags on the left hand side and didn't know how on earth to fill the big white space on the right. I was also tired after having done my first two early shifts back at work after being off for almost a month. ..... excuses, excuses, I hear you!

It took my poor little muse quite a long while to slowly create the result, for better and worse. It'll become clear in a little while!
I thought of using Baker's twine again to create links with the tags and then realised I needed to form a link from the left to the right, so just took a piece of Baker's twine from the right of the tags and took it straight across. NO! Far too boring! Instantly I just dragged the twine up instead of just across. YES! I like that. I added two more pieces to enable it to show up more and used light blue as well to tone in. Unfortunately the glue I used was playing up and it ended up going far too wide from the twine. At that point I was ready to throw it away. That's defeat though and I can't have that, now can I? May Flaum has taught me to never give in; there's always a way of hiding mistakes to enhance your card further. To this end, I decided to add more glue and glitter around the twine.

There's a reason I don't use glitter alot; I can't stand it! It gets everywhere!

Anyway, use it I did and then thought of putting the word 'enjoy' in the space still available. Nothing for it but to glitter those letters too - groan!

I used a die-cut of 'enjoy' on the envelope too but decided to steer clear of the glitter and I used LV2 Spectrum noir pen instead - much easier!
 
                                     ------------------------

The base card and the papers have a deep pink
hue, so it's really irritating to see it
looking bright orange in this photo
This card came about as the bloom dots embossing folder I'd ordered arrived and I 'had' to play with it. I instantly used it on the blue card which has been floating around, so to speak, lately. I then matted the tag embellishment with coordinating card. I used a strip of the patterned paper (which is actually meant to be a sentiment on the other side but it fitted almost perfectly onto the embossed card) as another element and matted that onto more of the patterned paper from the magazine. I then used some pearlescent card as the card base and used my Crafter's Companion Clever Cut to make the vertical edges scalloped and hey presto, there's the card!

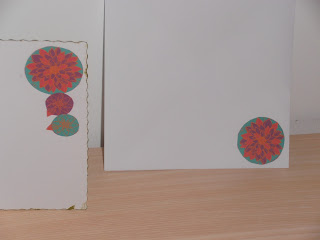
I did more embossing and some die-cutting on a small piece of matching patterned paper to create the stamp for the envelope.
I'm much happier with this card as there's NO glitter anywhere in sight :-)


                                                 -------------------------
Card number 3.

I have really enjoyed making these cards, despite that first one taking much longer and being far too fussy. This last one was fun in particular as I used alphabet spaghetti i.e die-cut left over letters.  I also got to use the new brads and ribbon which I got as part of my Stampers 15 club; which is a Stampin' Up club.
Spectrum Noir colour CR9 used for these letters.


I used Spectrum Noir colour GT2 to edge the card base and to colour the letters for the envelope.


If you get the Craftseller magazine, I hope you enjoy creating fun stuff too with the freebies and put a photo of your creations on their Facebook page.

Take care out there


Tuesday, 4 September 2012

Alcohol to spray

Hello there
I'm a happy girlie again as I bought these little beauties today - £3 for 4, so I bought 8 of course. Why? I hear you ask. Well, why not?! But why get excited about plastic bottles? Here's why:
Here's the alchohol. Not quite a bottle of wine but it's of more use to me than that. Carole Bryson Wood of Stampin' Up fame has told me how to make my own mists out of alchohol, water and re-inkers, so I'm getting all set up to start my own alchemy.

Bring it on!

Take care out there
p.s please visit  cheapfrankingmachinesupplies on ebay if you want to buy some alchohol yourself

Monday, 3 September 2012

I'm back at it!

Hello there

Yes, yee hah! I'm back to doing some crafting. I've been in Florida on holiday for two weeks and I've also been to Aviemore in Scotland for a week in August, so it's not been a great crafting time. I did actually make an ipad case in the week between Aviemore and Florida but I can't find the photos anywhere. I suspect that's because they got deleted from the sim card, trying to make room for more holiday pics. I definitely want to make at least one more, so hopefully I'll share the photos before they disappear off the face of the planet.
The only crafting I managed in Florida was a trip to Joanne's in Altamonte. I was in there two hours whilst the family had to look around there too. I had no idea I'd been that long until I left. They had so much fabric in there and so neatly displayed and easy to get it; I loved it.
Alright, enough of embarrasing photos, back to the matter in hand, which is actually meant to be a card I've made for the birthday of a friend of my daughter's. I wanted to use the Indian Summer papers from the latest Craftseller magazine. My daughter looked through the samples and chose one but then I remembered about a card I'd seen over at My Craft Spot blog which uses negative images. So I just went ahead and did the card I wanted to do. I'll probably still have to make the one she chose but I'm hoping she'll prefer the design of the one I've made - fingers crossed!

I started off by cutting out all the papers and embellishments and added bits of Glossy Accents and glitter where I thought would be nice.


I used a 15cm x15cm card blank and then cut the patterned paper a few millimetres smaller than that and then cut the top piece from Neenah super smooth card at about 14cm or smaller; sorry, I'm not much use with measuring as I usually just hand cut the same size pieces down to the size I physically can see I need.

Firstly I stamped 'Happy' up the bottom left hand corner and then I cut 'birthday' out vertically with Plantin School Book using the roly poly button. In my trial cut, I used 1.5cm but I thought it was a bit too tight to the edges, so I changed the setting to m.m's and made the letters 13m.m; real dial size too. Your sample cut will show you whereabouts you need to start cutting the word to make sure it fits on and also so that it's high enough to allow room for the words 'to you' underneath.


 I used Pinflair glue to place that mat on top of the patterned paper, ensuring it was raised slightly; this gives the best result for seeing the paper through the negative letters.

Once that had dried, I cut the balloons from Create a Critter using standard shift. I cut the tails off two of them and replaced them with cherry red Baker's Twine, tied together at the end.
A bit of a tip for new Cricut expression users; to find an image on your cartridges, use the image search facility on Cricut Craft room. It's brilliant as it gives the results in either image order or cartridge order, so you can not only pick the best ones you have but also be able to go straight to that cartridge to get it cut. I'd also suggest you do keep the software of your machine up to date. I had to update mine whilst doing this card; it feels like a real pain at the time but it's important to keep it usable for you.

Since I had cut out the balloon shapes on a practise piece of card, I was left with the stencil of those shapes, so I put it to good use by putting the balloon shapes on the envelope and inside the card. It finishes the whole package off nicely in my opinion.

Let's hope my daughter agrees.

Take care out there.

P.S For those of you paying attention, I'll try to remember to show you how I actually use the embellishments from the magazine in another post, as I didn't actually use any on this card :-)
Related Posts Plugin for WordPress, Blogger...